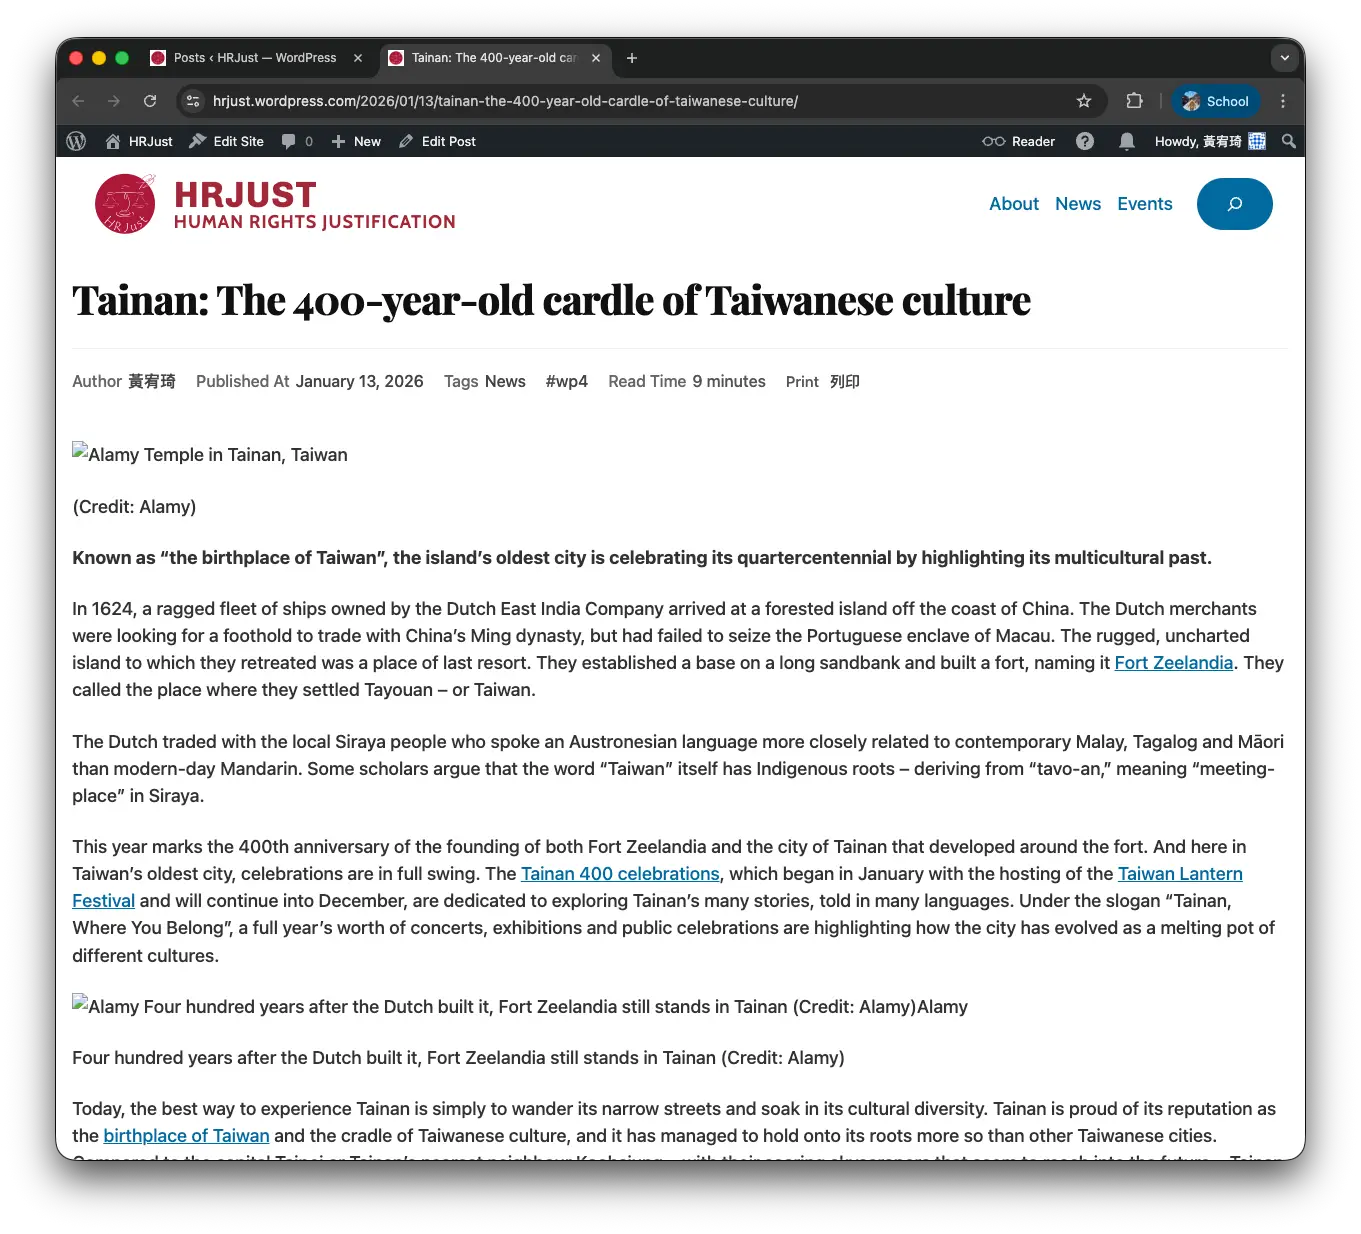
HRJust Website: User Guide for Posting Content
Version: 1.0
Date: January 14, 2026
1. Preparation: Drafting Your Content (Recommended)
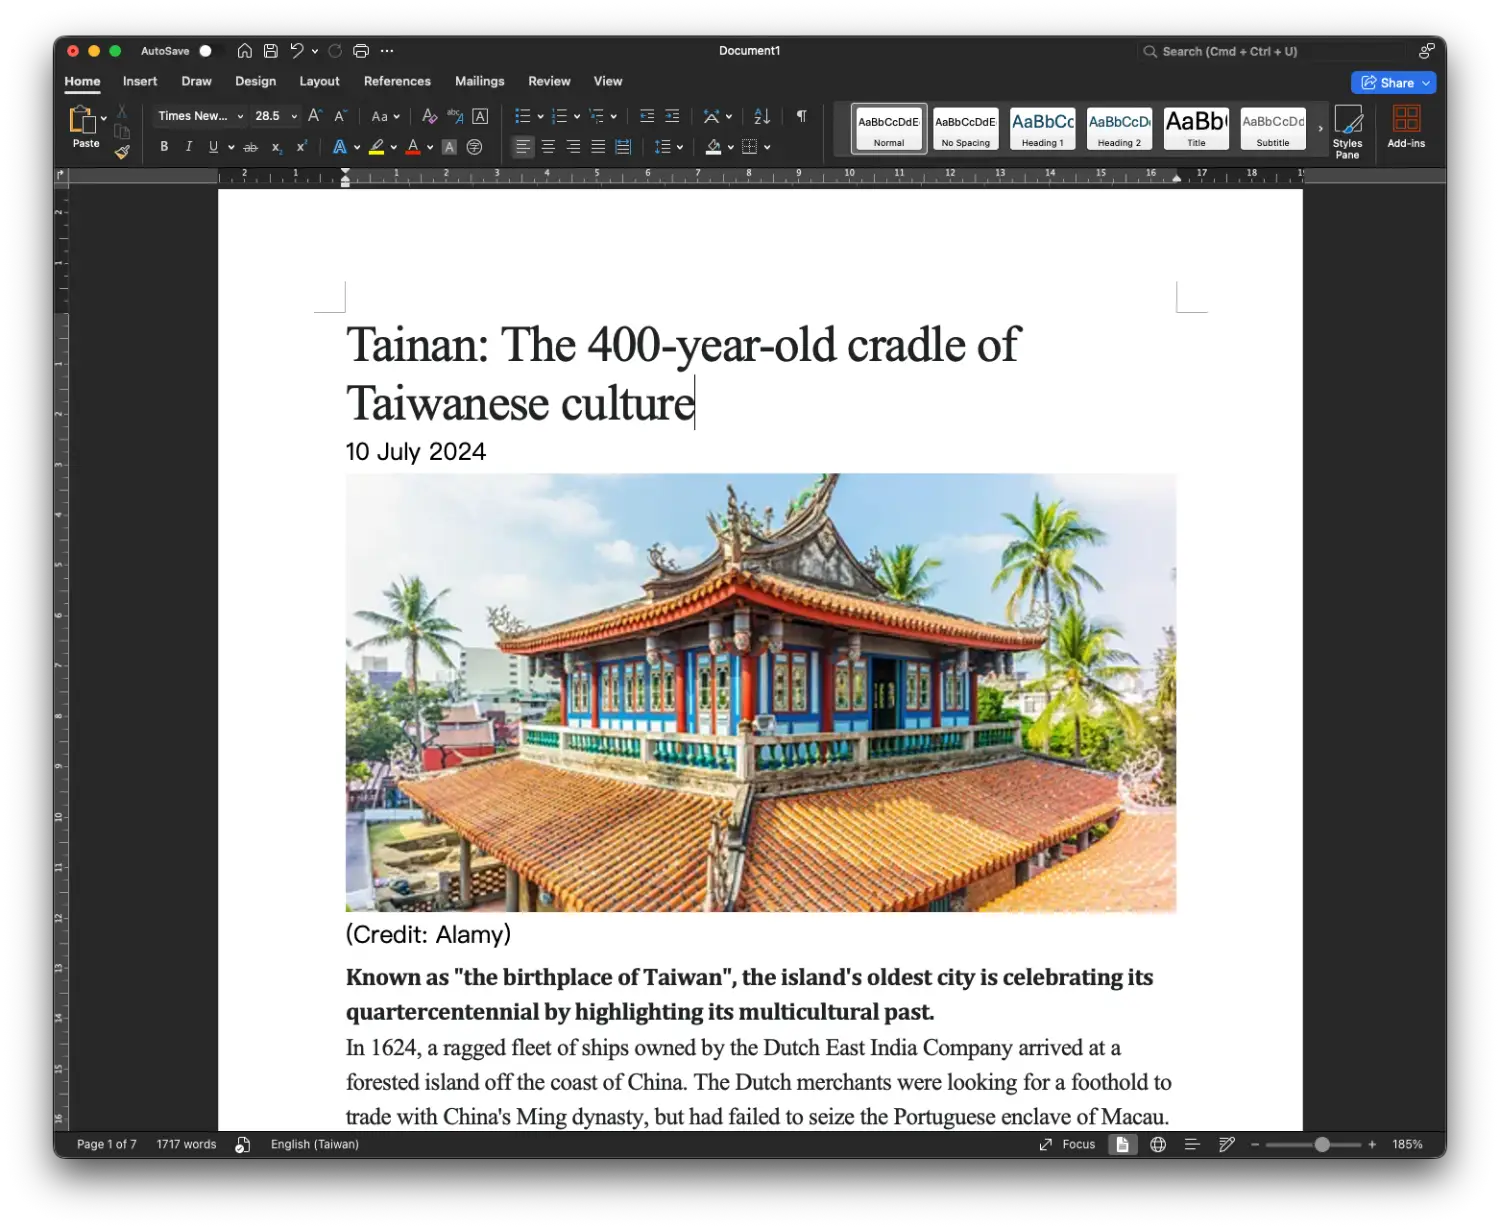
Before logging into the website, we highly recommend drafting your article in Google Docs or Microsoft Word.
- Why? It acts as a backup, allows for easier team collaboration, and lets you use spell-check tools comfortably.
- How: Write your title, text, and organize your paragraphs in Google Docs.
- Magic Feature: WordPress is smart! When you copy content from Google Docs and paste it into WordPress, it automatically keeps most of your formatting (like Bold, Italic, and Headings).
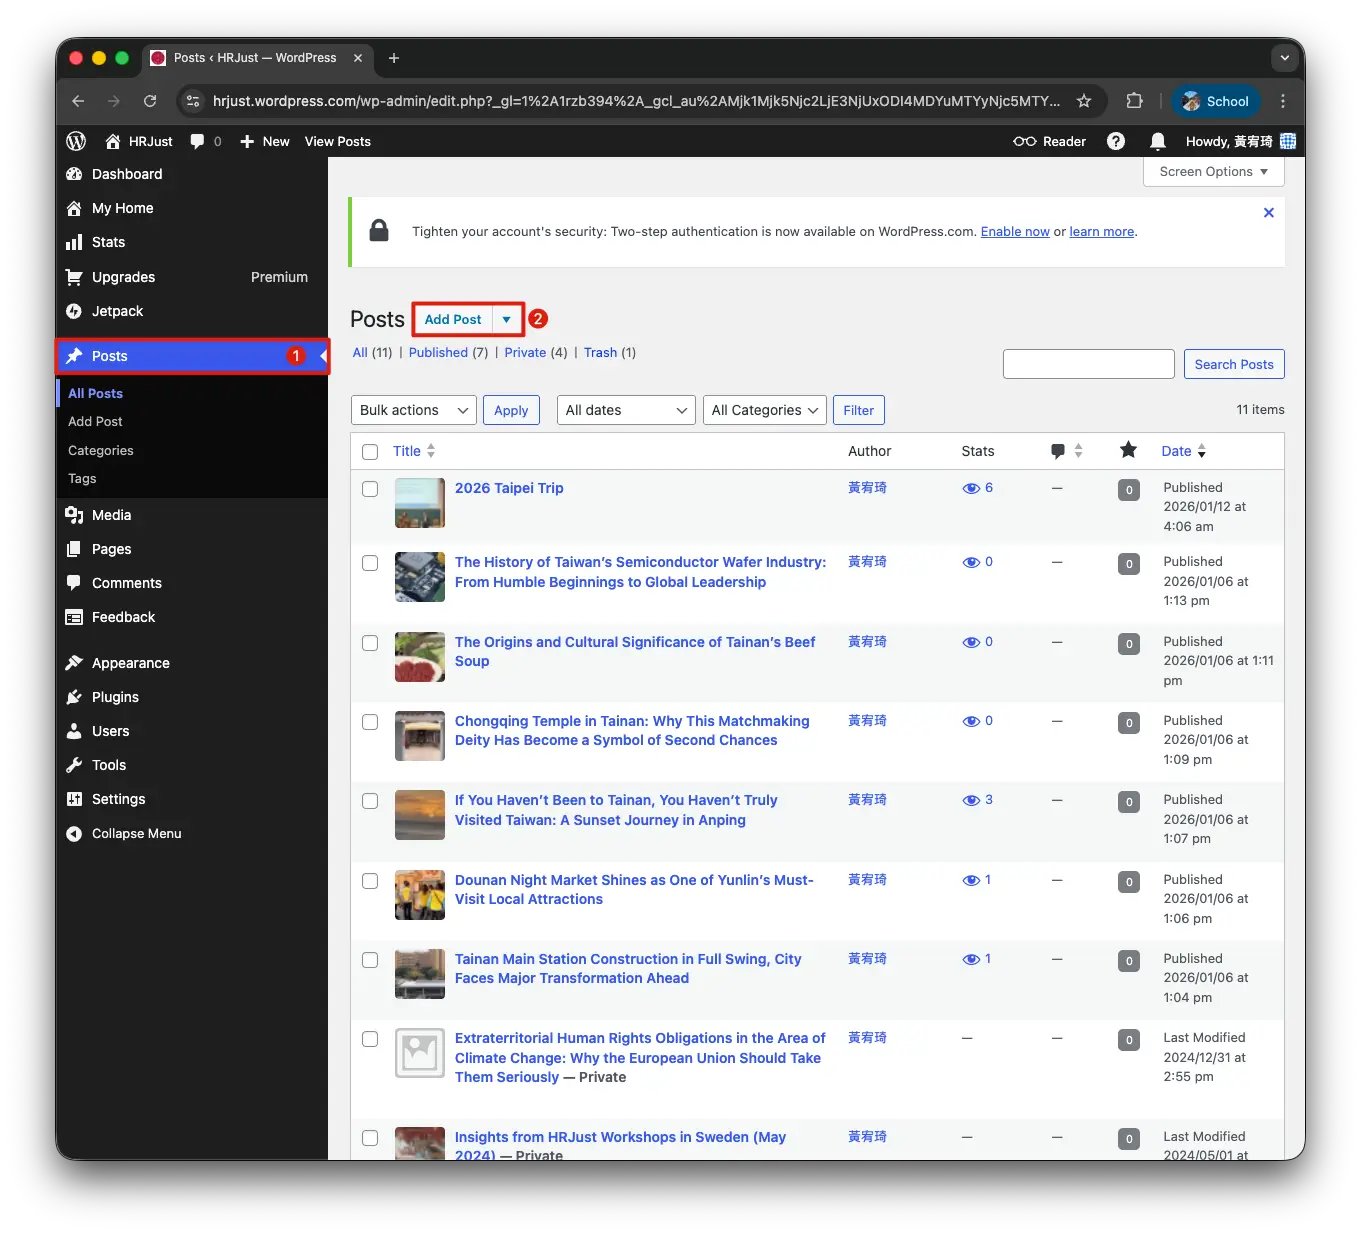
2. Accessing the Editor
- Log in to the HRJust website admin panel (Dashboard).
- On the left-hand menu, click on Posts.
- Click the Add New Post button at the top of the screen.
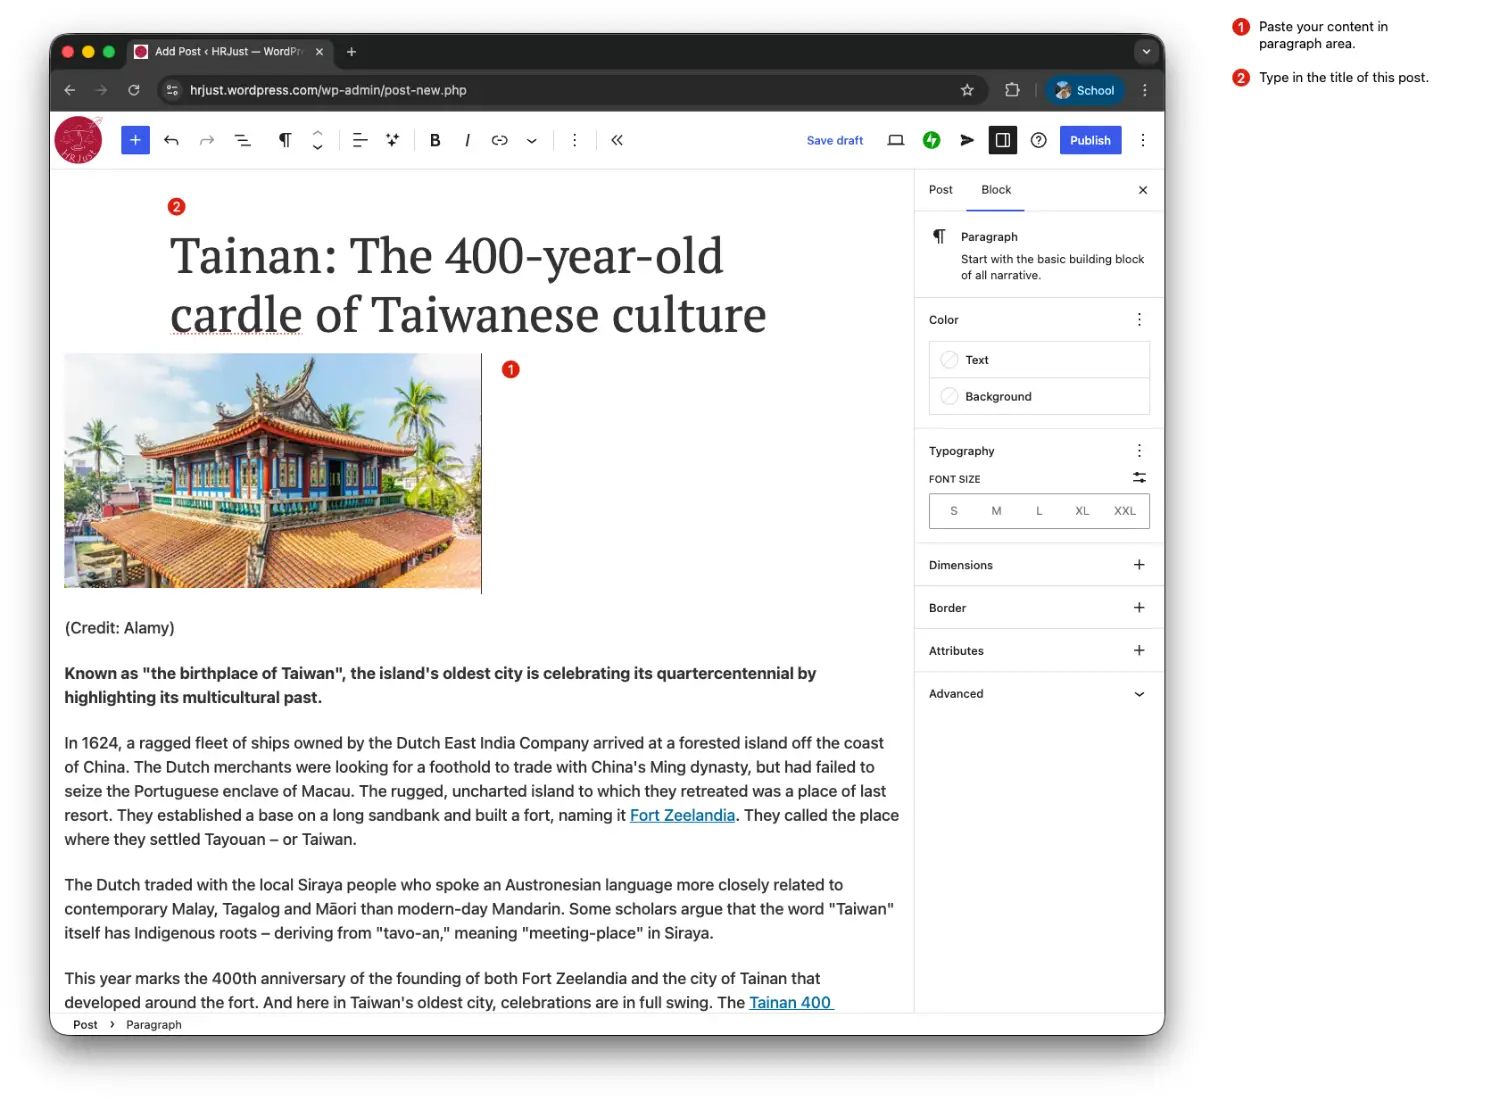
3. Adding Content
The Title
Enter the title of your article in the top field that says "Add title".
Pasting Text
Click where it says "Type / to choose a block" and paste your text from Google Docs or Microsoft Word (Ctrl+V or Cmd+V). The website will automatically create the paragraphs for you. You can also explore some widgets from WordPress by yourself, but edit in word is recommended.
4. Editing and Formatting
WordPress uses "Blocks" for content. Every paragraph, image, or heading is a separate block.
Changing Font Size (Headings)
To make text larger (for subtitles or section headers):
- Click on the paragraph you want to change.
- In the toolbar that appears above the text, click the Paragraph symbol (¶).
- Select Heading.
- Choose H2 or H3. (H1 is reserved for the main title).
Changing Text Color
- Click on the specific block (paragraph) you want to color.
- Look at the Sidebar on the right (Settings panel).
- Click on Color.
- Select a color from the Text palette.
- Tip: Use this sparingly to maintain a professional look.
Bold and Italic
Highlight the specific text you want to format and use the B (Bold) or I (Italic) buttons in the floating toolbar.
5. Uploading Images
- Press the Enter key to create a new line (a new empty block).
- Click the + (Plus) button on the right side of the empty block.
- Select Image.
- Click Upload to choose a file from your computer.
- Important:
- Once uploaded, you can add a Caption below the image.
- Use the alignment options in the toolbar to center or align the image.
- Hint: You can just paste the image to website and the system create a image block automatically.
6. Organization: Categories and Tags
To ensure your article appears in the correct section (e.g., specific Work Packages) and can be filtered by users, you must set Categories and Tags.
Look at the Right Sidebar (ensure the "Post" tab is selected at the top).
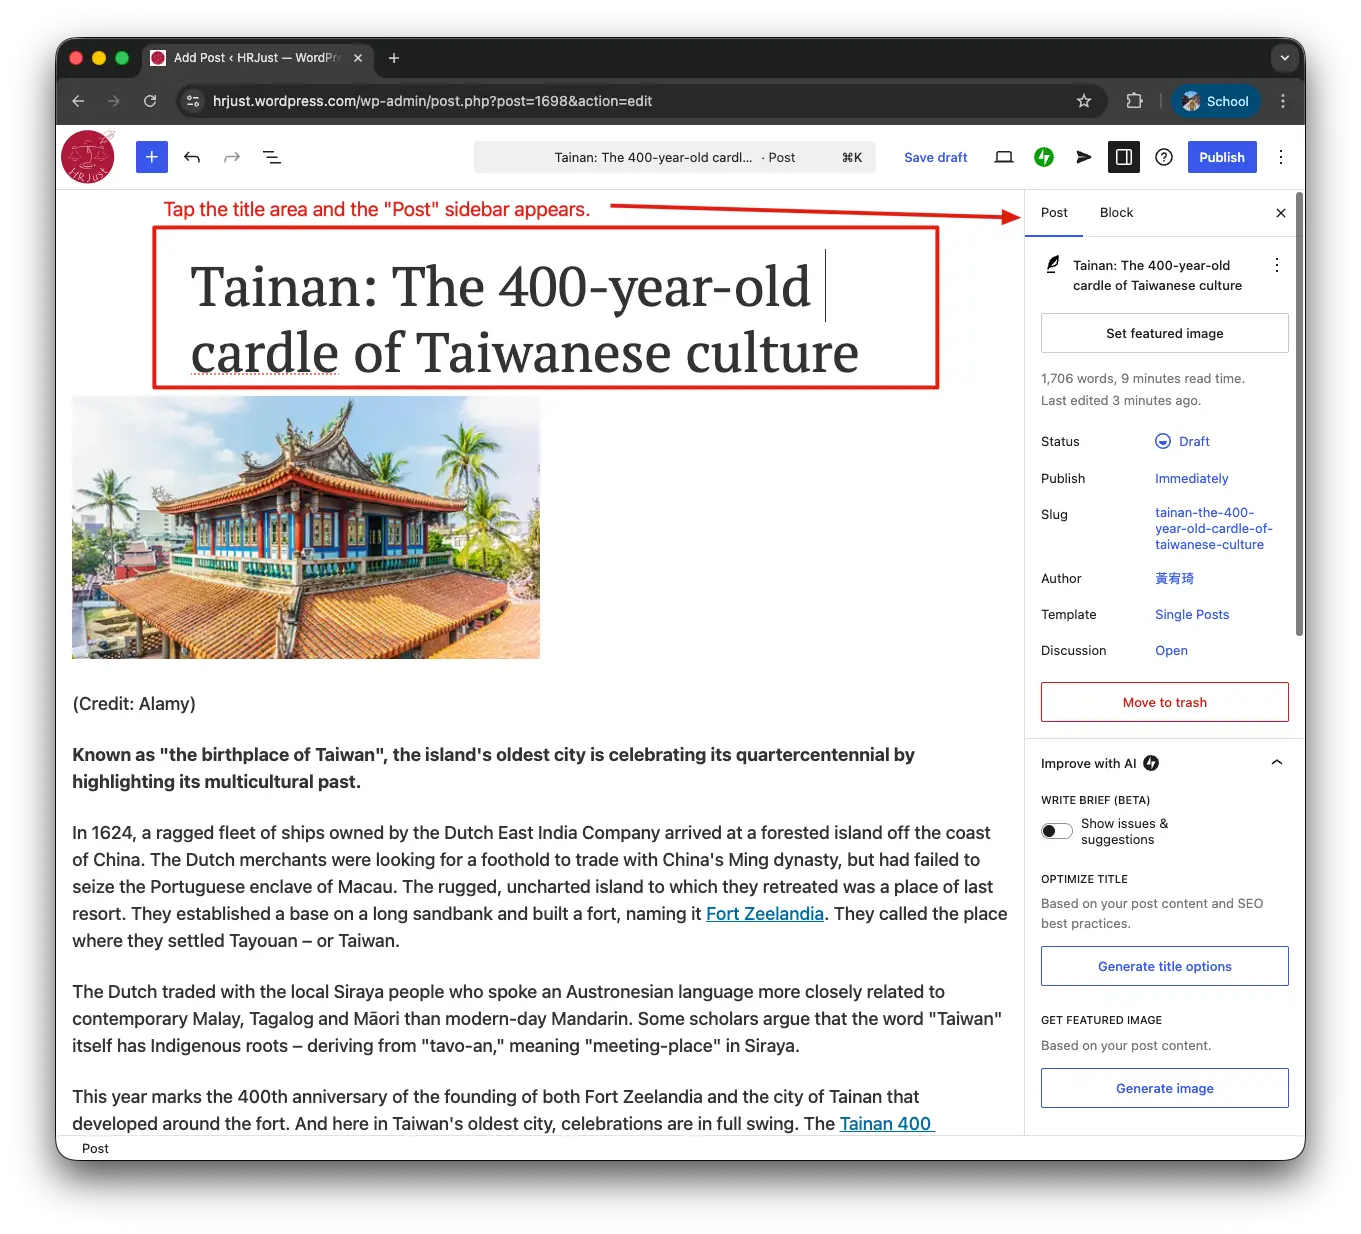
A. Categories
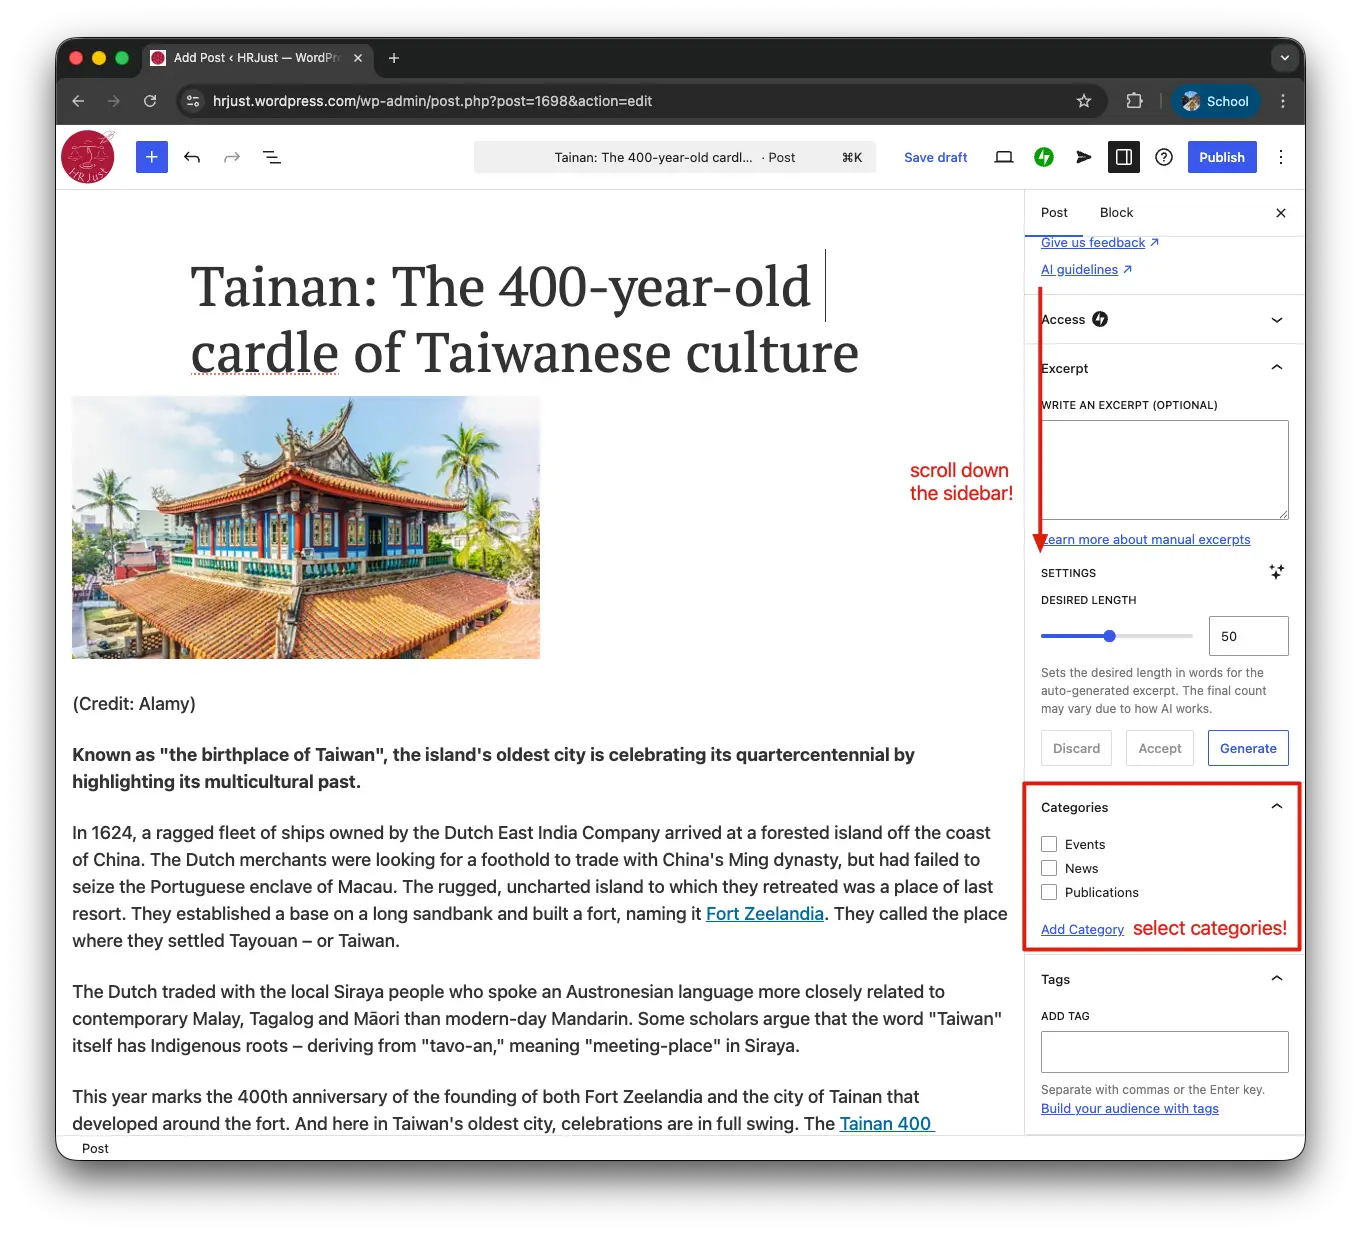
Categories are the broad grouping of your content (e.g., News, Events).
- Scroll down to the Categories section.
- Check the box for the relevant category (e.g., News).
- Do not leave it as "Uncategorized.", or it will not appears in website.
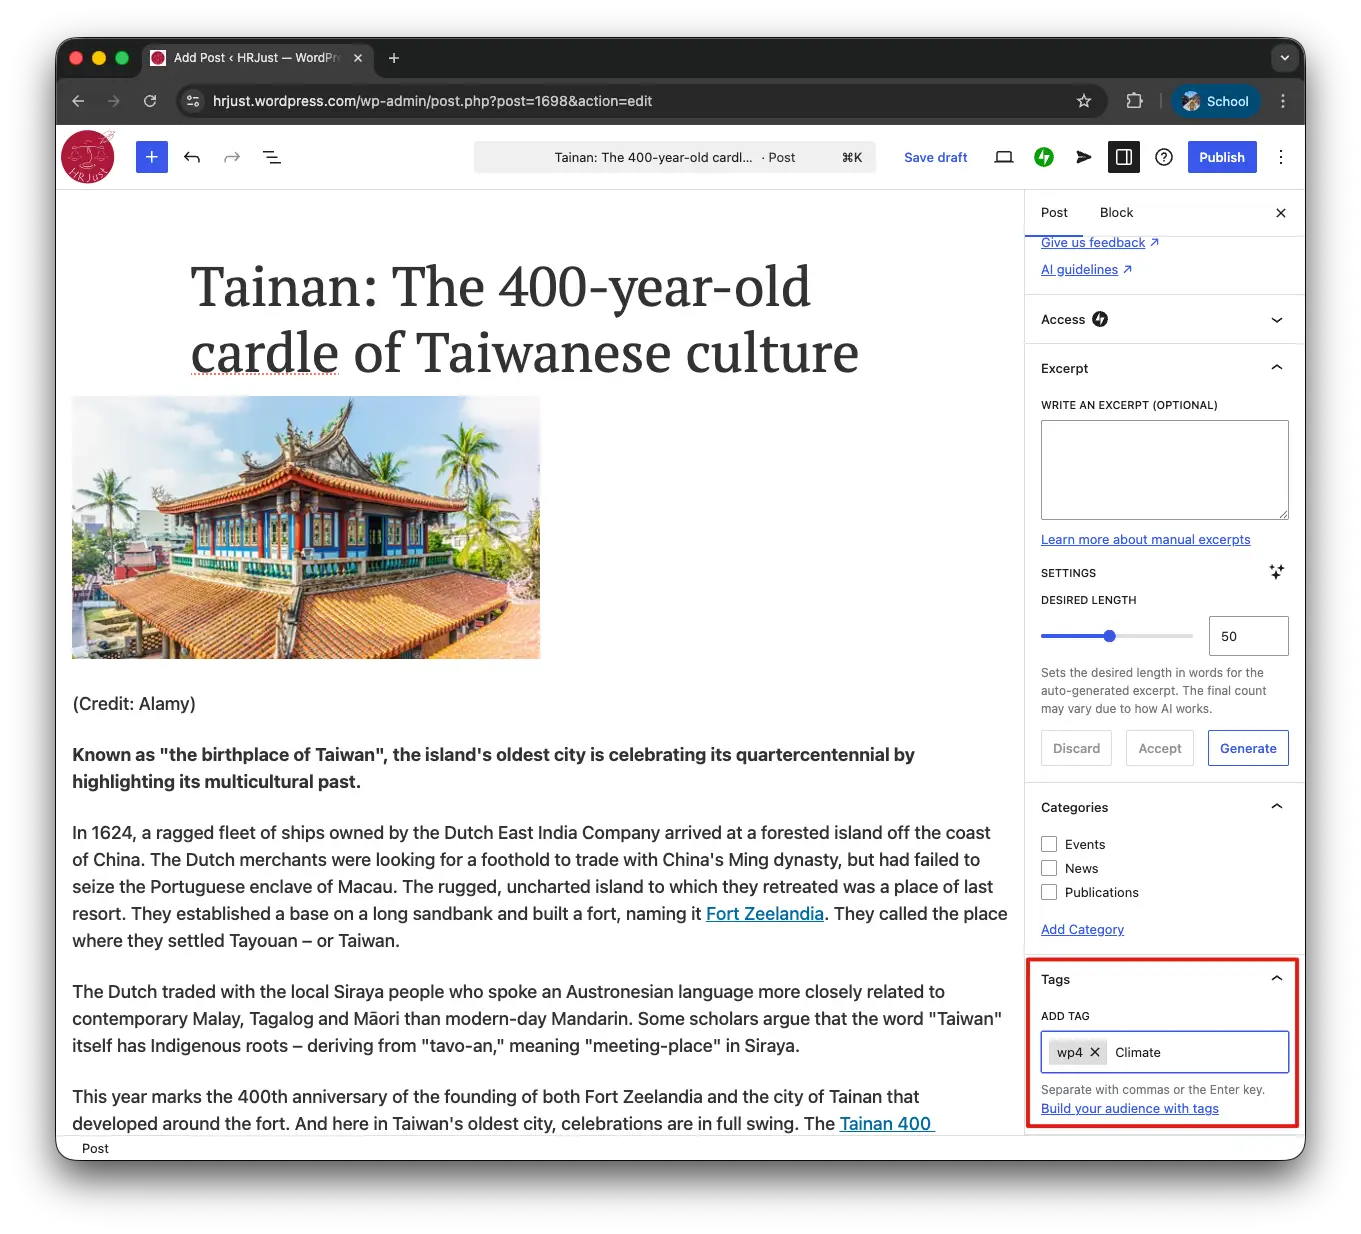
B. Tags (For Work Packages & Filtering)
Tags are specific keywords that allow the filtering system to work.
- Scroll down to the Tags section.
- Type a new tag (e.g.,
WP1,Climate,Migration) or start typing to select an existing one. - Press Enter or Comma to add the tag.
- Tip: Be consistent! If you use
WP1for one post, don't useWork Package 1for another. Stick to one format so the filter works correctly.
7. Publishing
- Preview: Click the View icon (top right) -> Preview in new tab to see how it looks to visitors.
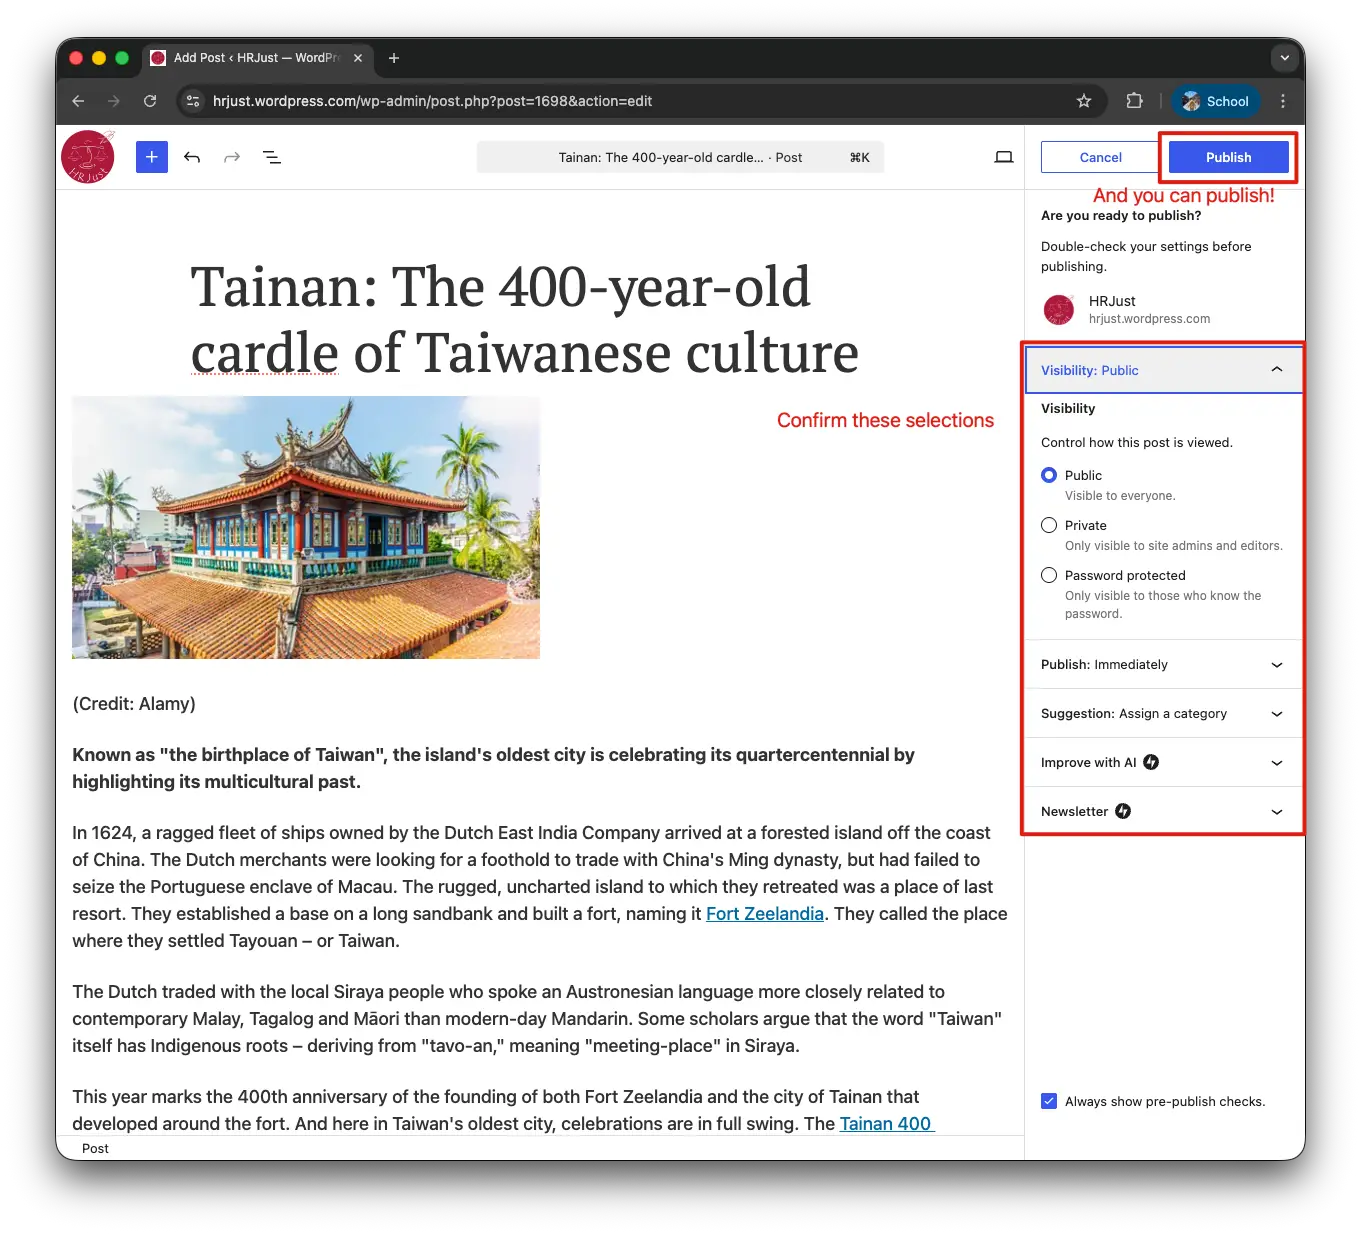
- Publish: When you are ready, click the blue Publish button at the top right.
- Confirm: Click Publish again to confirm. Your post is now live!
Important: Please confirm carefully the "Newsletter" section. By default, the system sends your new post to everyone who subscribe the newsletter to HRJust. You can turn it off.
You can modify or delete posts in WordPress, "Post" Area.
Quick Summary Checklist
- Title added?
- Content pasted and formatted?
- Images uploaded?
- Category selected?
- Tags added?
- Click Publish!
Results